National Fluids Lease Sale SystemU.S. Department of Interior | Bureau of Land Management (BLM)Create a New Oil & Gas Application (Expression of Interest)
Add Lands 2 of 2Quick Guide
This Quick Guide will provide you with step-by-step instructions on how to continue adding lands to an Oil & Gas Application (Expression of Interest). To view the previous steps in the process, visit Create a New Oil & Gas Application (Expression of Interest) - Add Lands 1 of 2 Quick Guide.
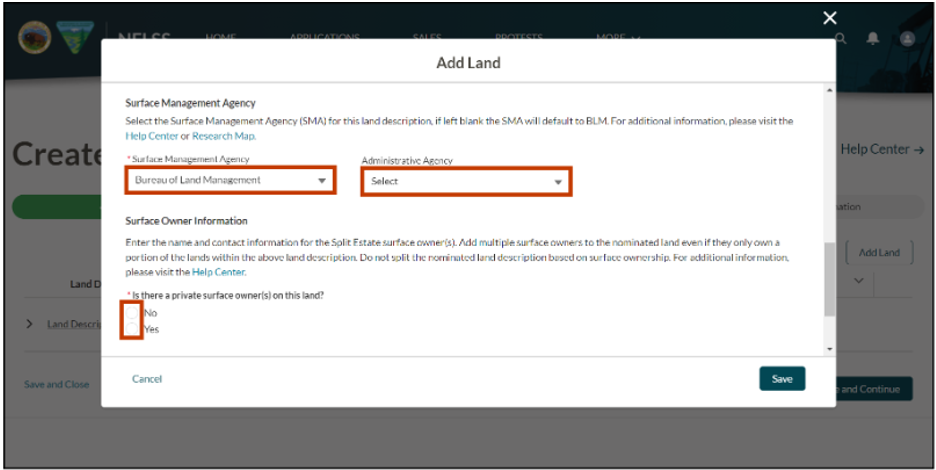
Select the Surface Management Agency. The Surface Management Agency is the U.S. Federal agency having management responsibility for the surface resources that overlay federally owned minerals. If left blank, the field will default to the BLM. To determine the Surface Management Agency for the nominated lands, refer to the GLO Land Catalog. For example, nominated lands managed by the Kisatchie National Forest. The Surface Management Agency is the Forest Service.
Select the associated regional Administrative Agency from the dropdown. This field is not required if the BLM manages the surface resources. For example, nominated lands managed by the Kisatchie National Forest. The Administrative Agency is Kisatchie.
In the Surface Owner Information section, answer the question “Is there a private surface owner(s) on this land?” by selecting the Yes or No radio button. Only used for private surface owners. The private surface owner(s) name and address is required if the surface of the land is privately owned by a person(s) or entity other than the United States. Left blank for surface managed by the BLM or other Federal agencies.
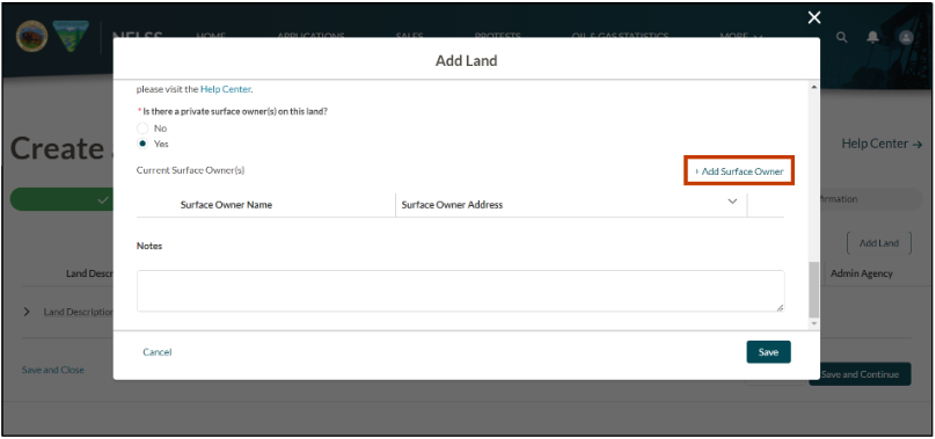
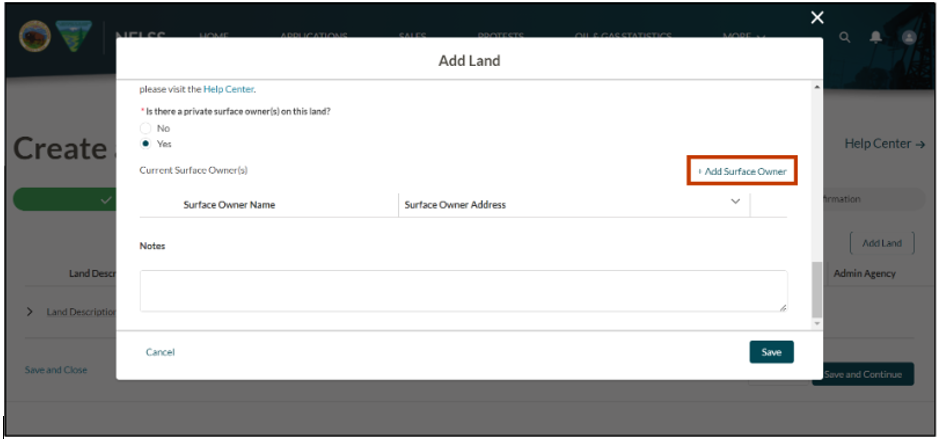
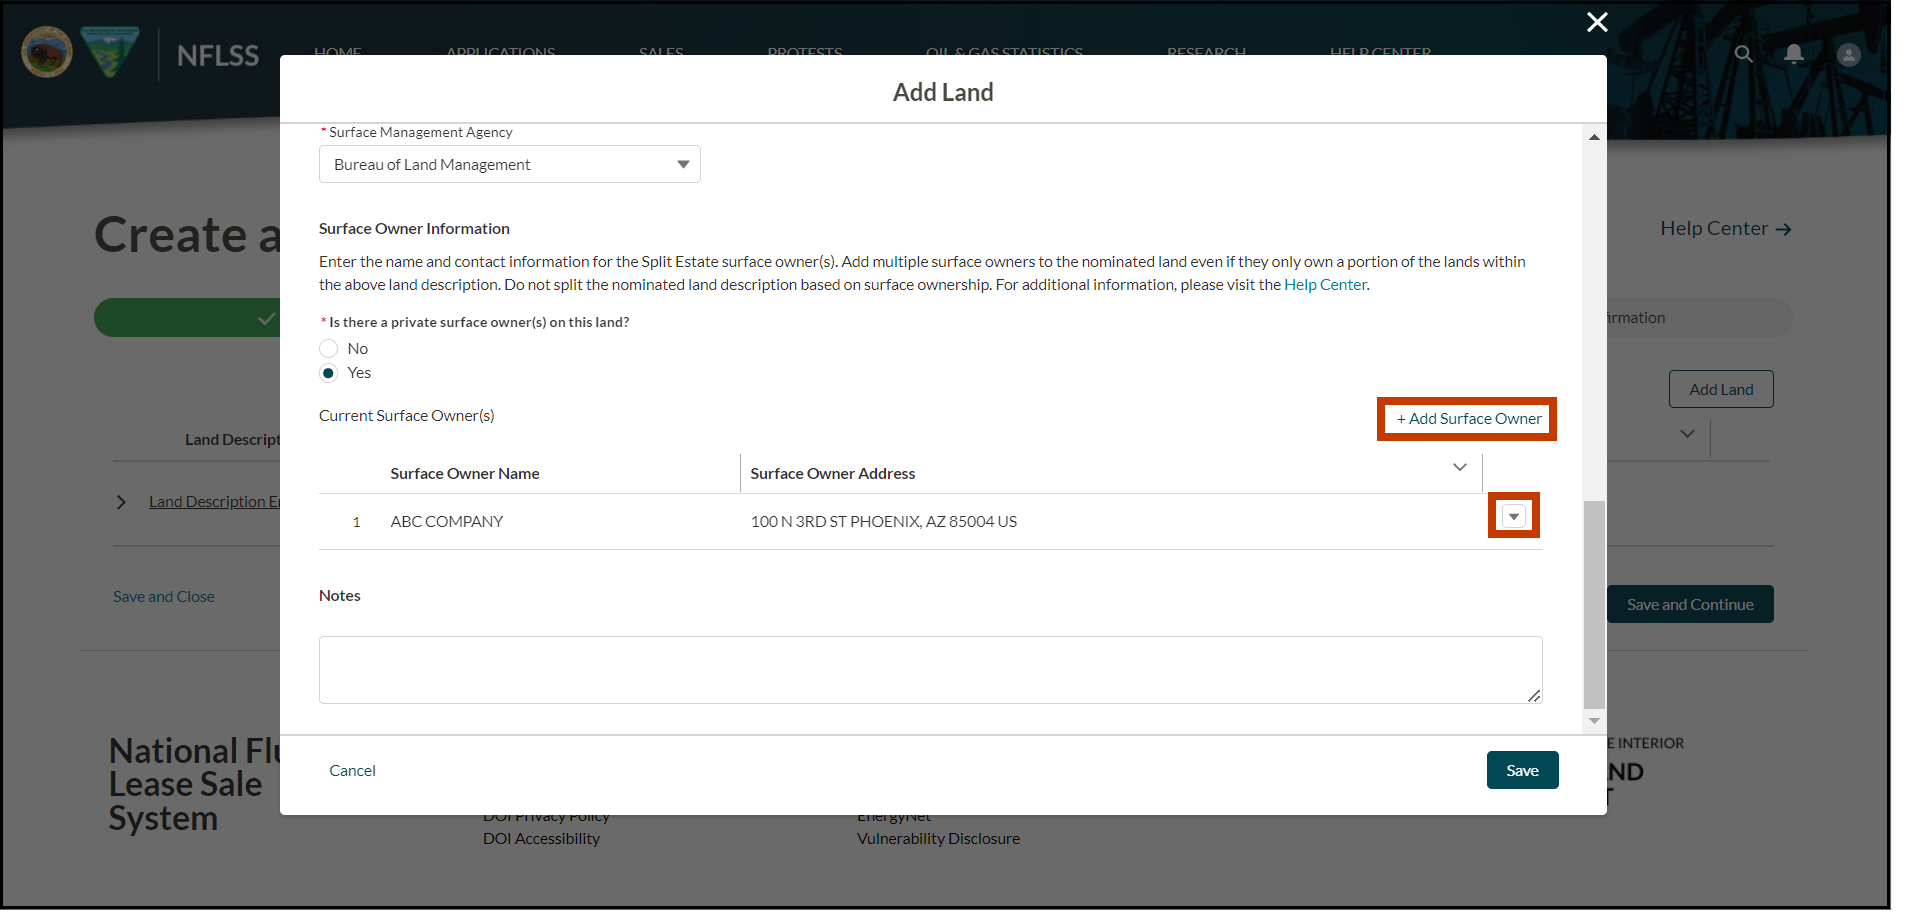
If there are private surface owners and Yes was selected in the previous step, the additional Current Surface Owner(s) fields will display. The private surface owner(s) name and address is required if the surface of the land is privately owned by a person(s) or entity other than the United States. Select the + Add Surface Owner link.
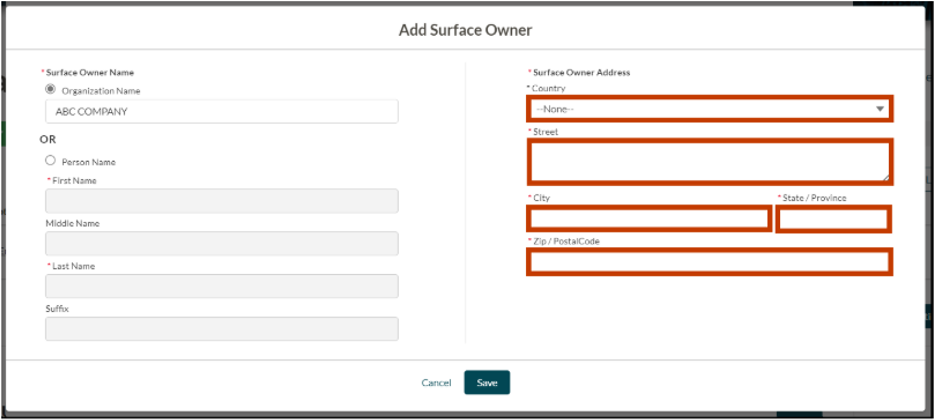
The Add Surface Owner Name pop-up will appear. Select the Organization Name radio button if the private surface owner is a company or an entity that is not a person (e.g., LLC, state agency, trust, etc.), or select the Person Name radio button if the private surface owner is an individual. You may only enter either the Organization Name or the Person Name.
Once you have selected the Organization or the Person radio button, the reciprocating name fields will become editable.
If you selected the Organization radio button, type the organization name into the field. The text will default to all capital letters.
If you selected the Person radio button, type the First Name and Last Name into the appropriate fields. The Middle Name and Suffix fields are optional. The text will default to all capital letters.
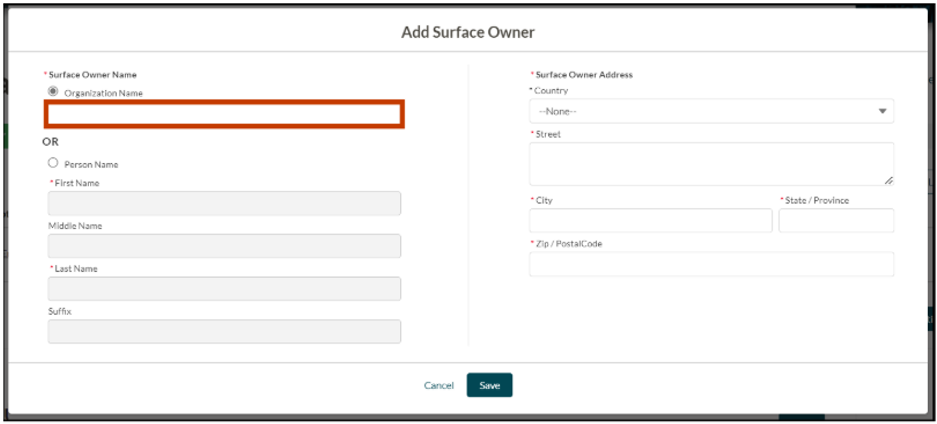
In the Surface Owner Address section, select the Country from the dropdown.
Type the street address in the Street field, type the city in the City field, type state or province in the State/Province field, and then type the zip or postal code in the Zip/Postal Code field.
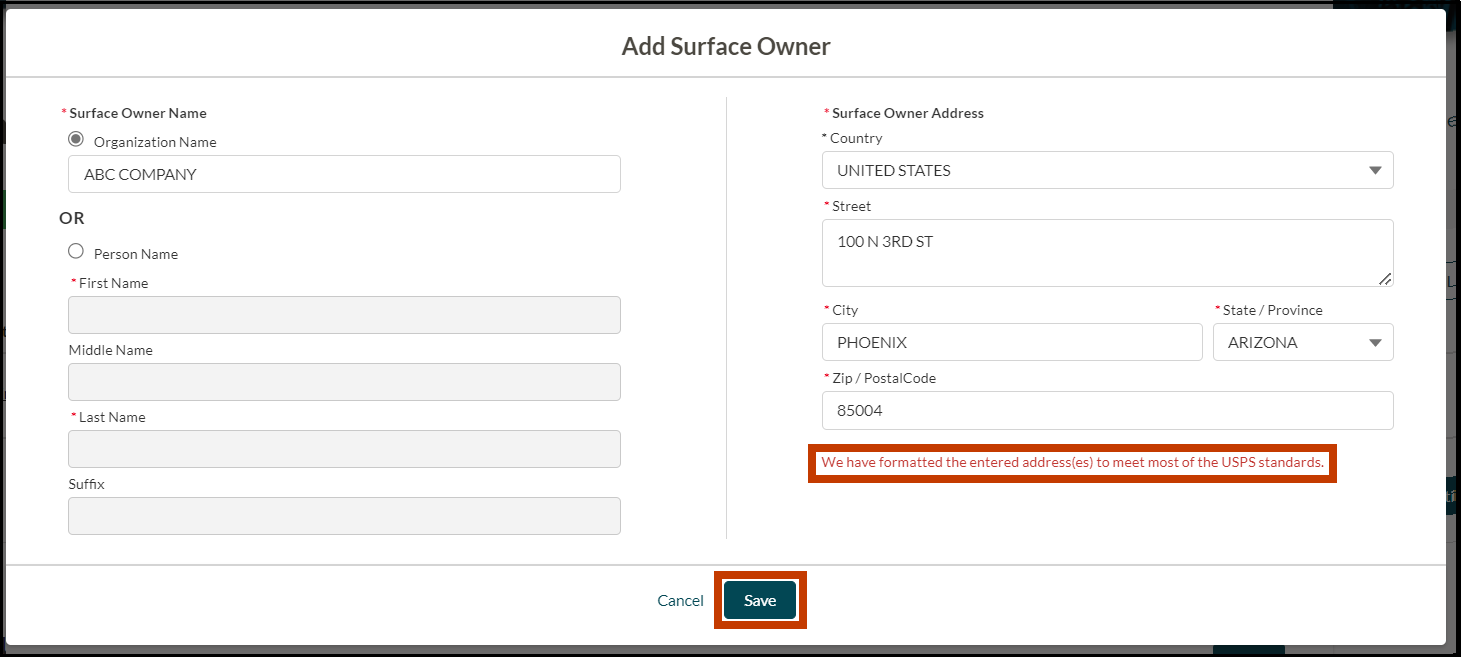
Select the Save button. The address will automatically update to U.S. Postal Service (USPS) formatting. The information will not save if the address is not found in the USPS system.
If there are additional surface owners, select the + Add Surface Owner link to repeat the process to enter all of the surface owners for the legal land description previously entered.
If you need to delete a surface owner, select the drop-down arrow, then select Delete.
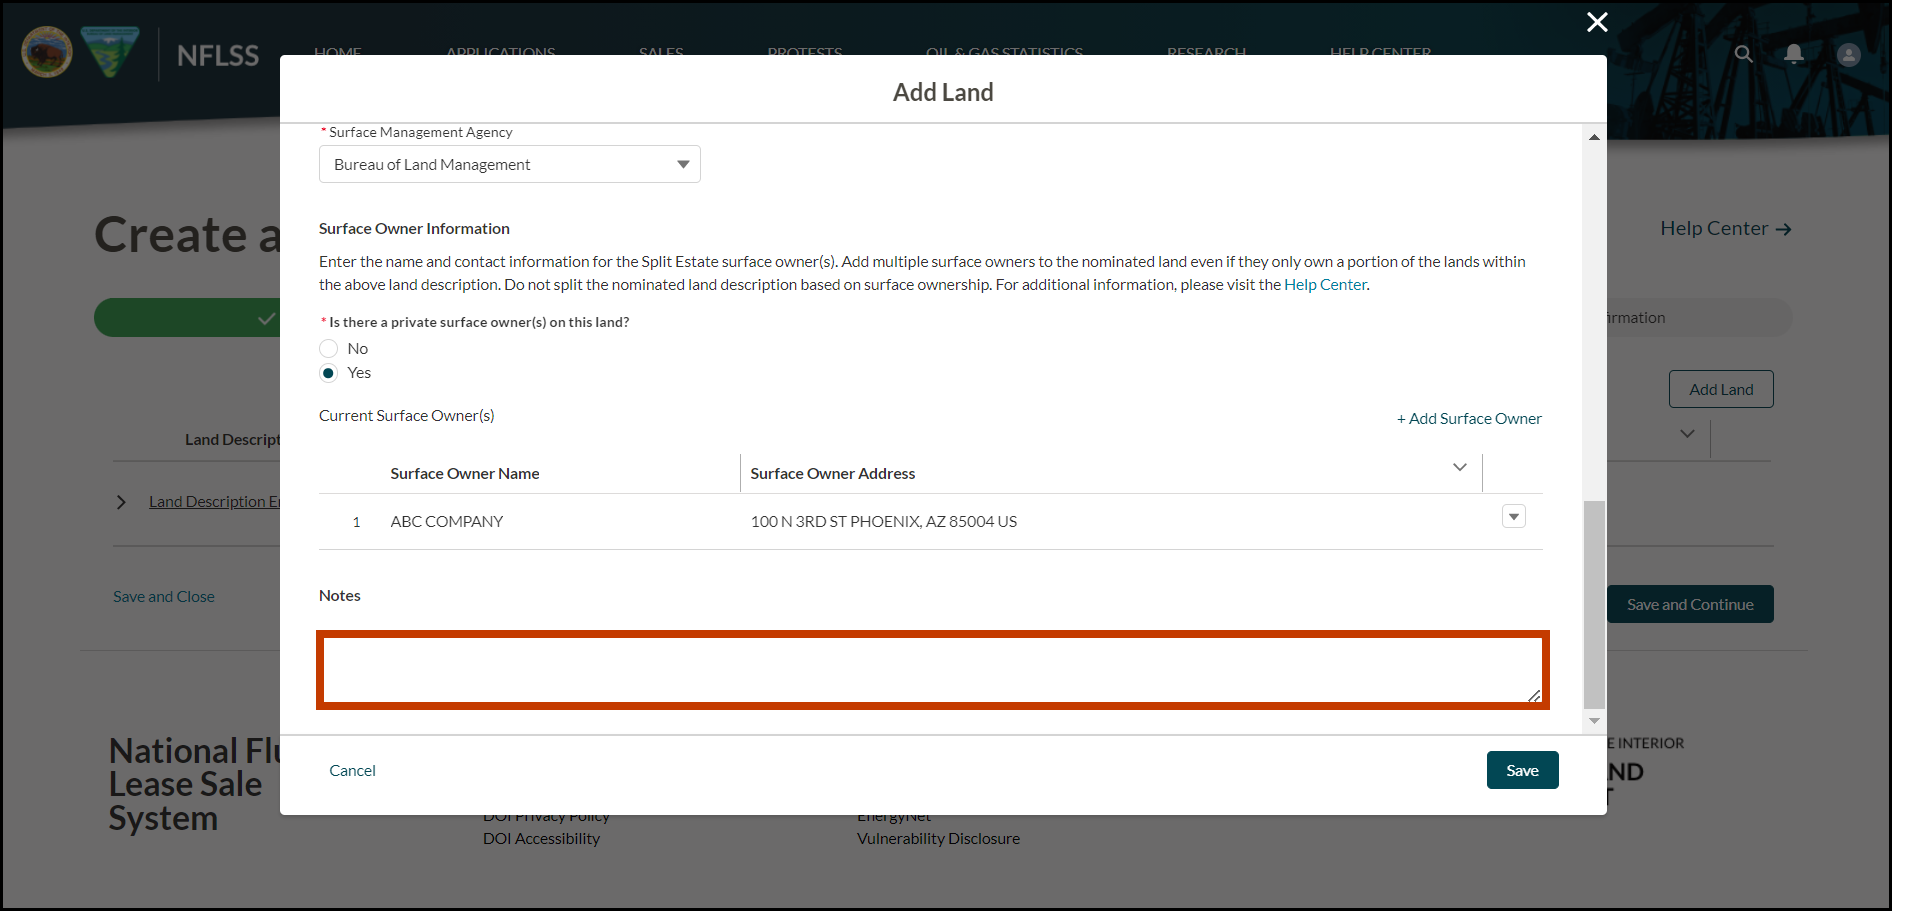
In the Notes field, type any additional information that may be pertinent to the review/adjudication of the nominated land.
Once you have finished, select the Save button.
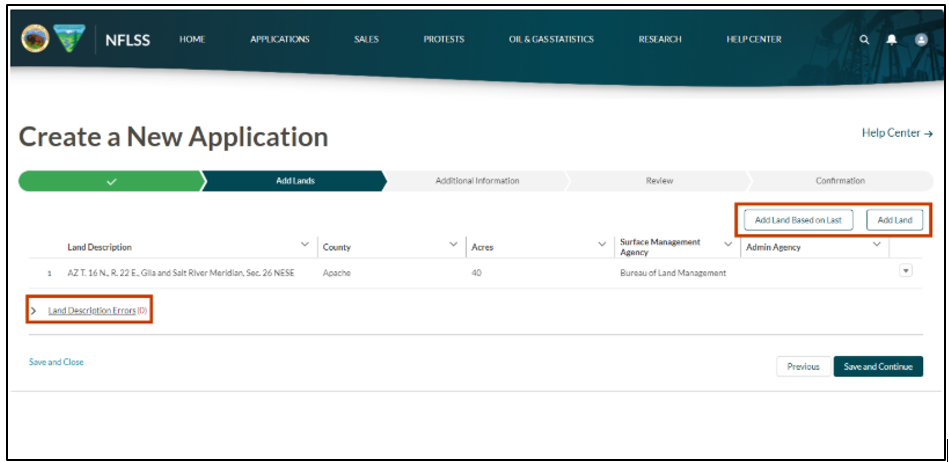
The land description has been added to your application. If there are any errors, they will appear in the Land Description Error link for you to remedy.
Selecting the Add Land Based on Last button will navigate you to the Add Land page and the previously entered nominated land data is copied to the new nominated land (copied fields include: Geo State, Meridian, Counties, Township, Range, Percent of U.S. Mineral Interest, Future Minerals Interest, Surface Management Agency, Administrative Agency, and private surface owner information). Any of the copied fields can be updated.
Selecting the Add Land button will also navigate you to the Add Land page, where you will need to enter in the legal land description, leasable mineral data, Surface Management Agency, and private surface owner information for the additional nominated lands.
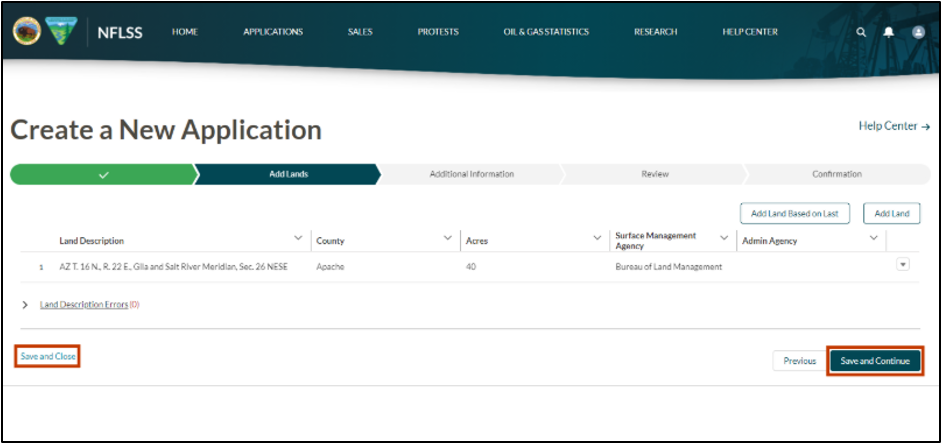
Select either the Save and Close link to save your progress and finish completing the application at a later time, or select the Save and Continue button to advance to the next stage.
To view the next steps in the process, visit Create a New Oil & Gas Application (Expression of Interest) - Additional Information Quick Guide.
Contact the BLM Public Help Desk with any additional questions.